

If you follow me on Instagram, you know that I’m a passionate organic gardener. I spent seven years in our last home, transforming our small back yard into what looked like paradise to me and what probably looked like too much work to most of the people who looked at our house on realtor.com. 🙂 I focused on edible landscaping. For our family with small children, that meant I turned our garden into what was intended to be a fun maze of exploration and deliciousness.

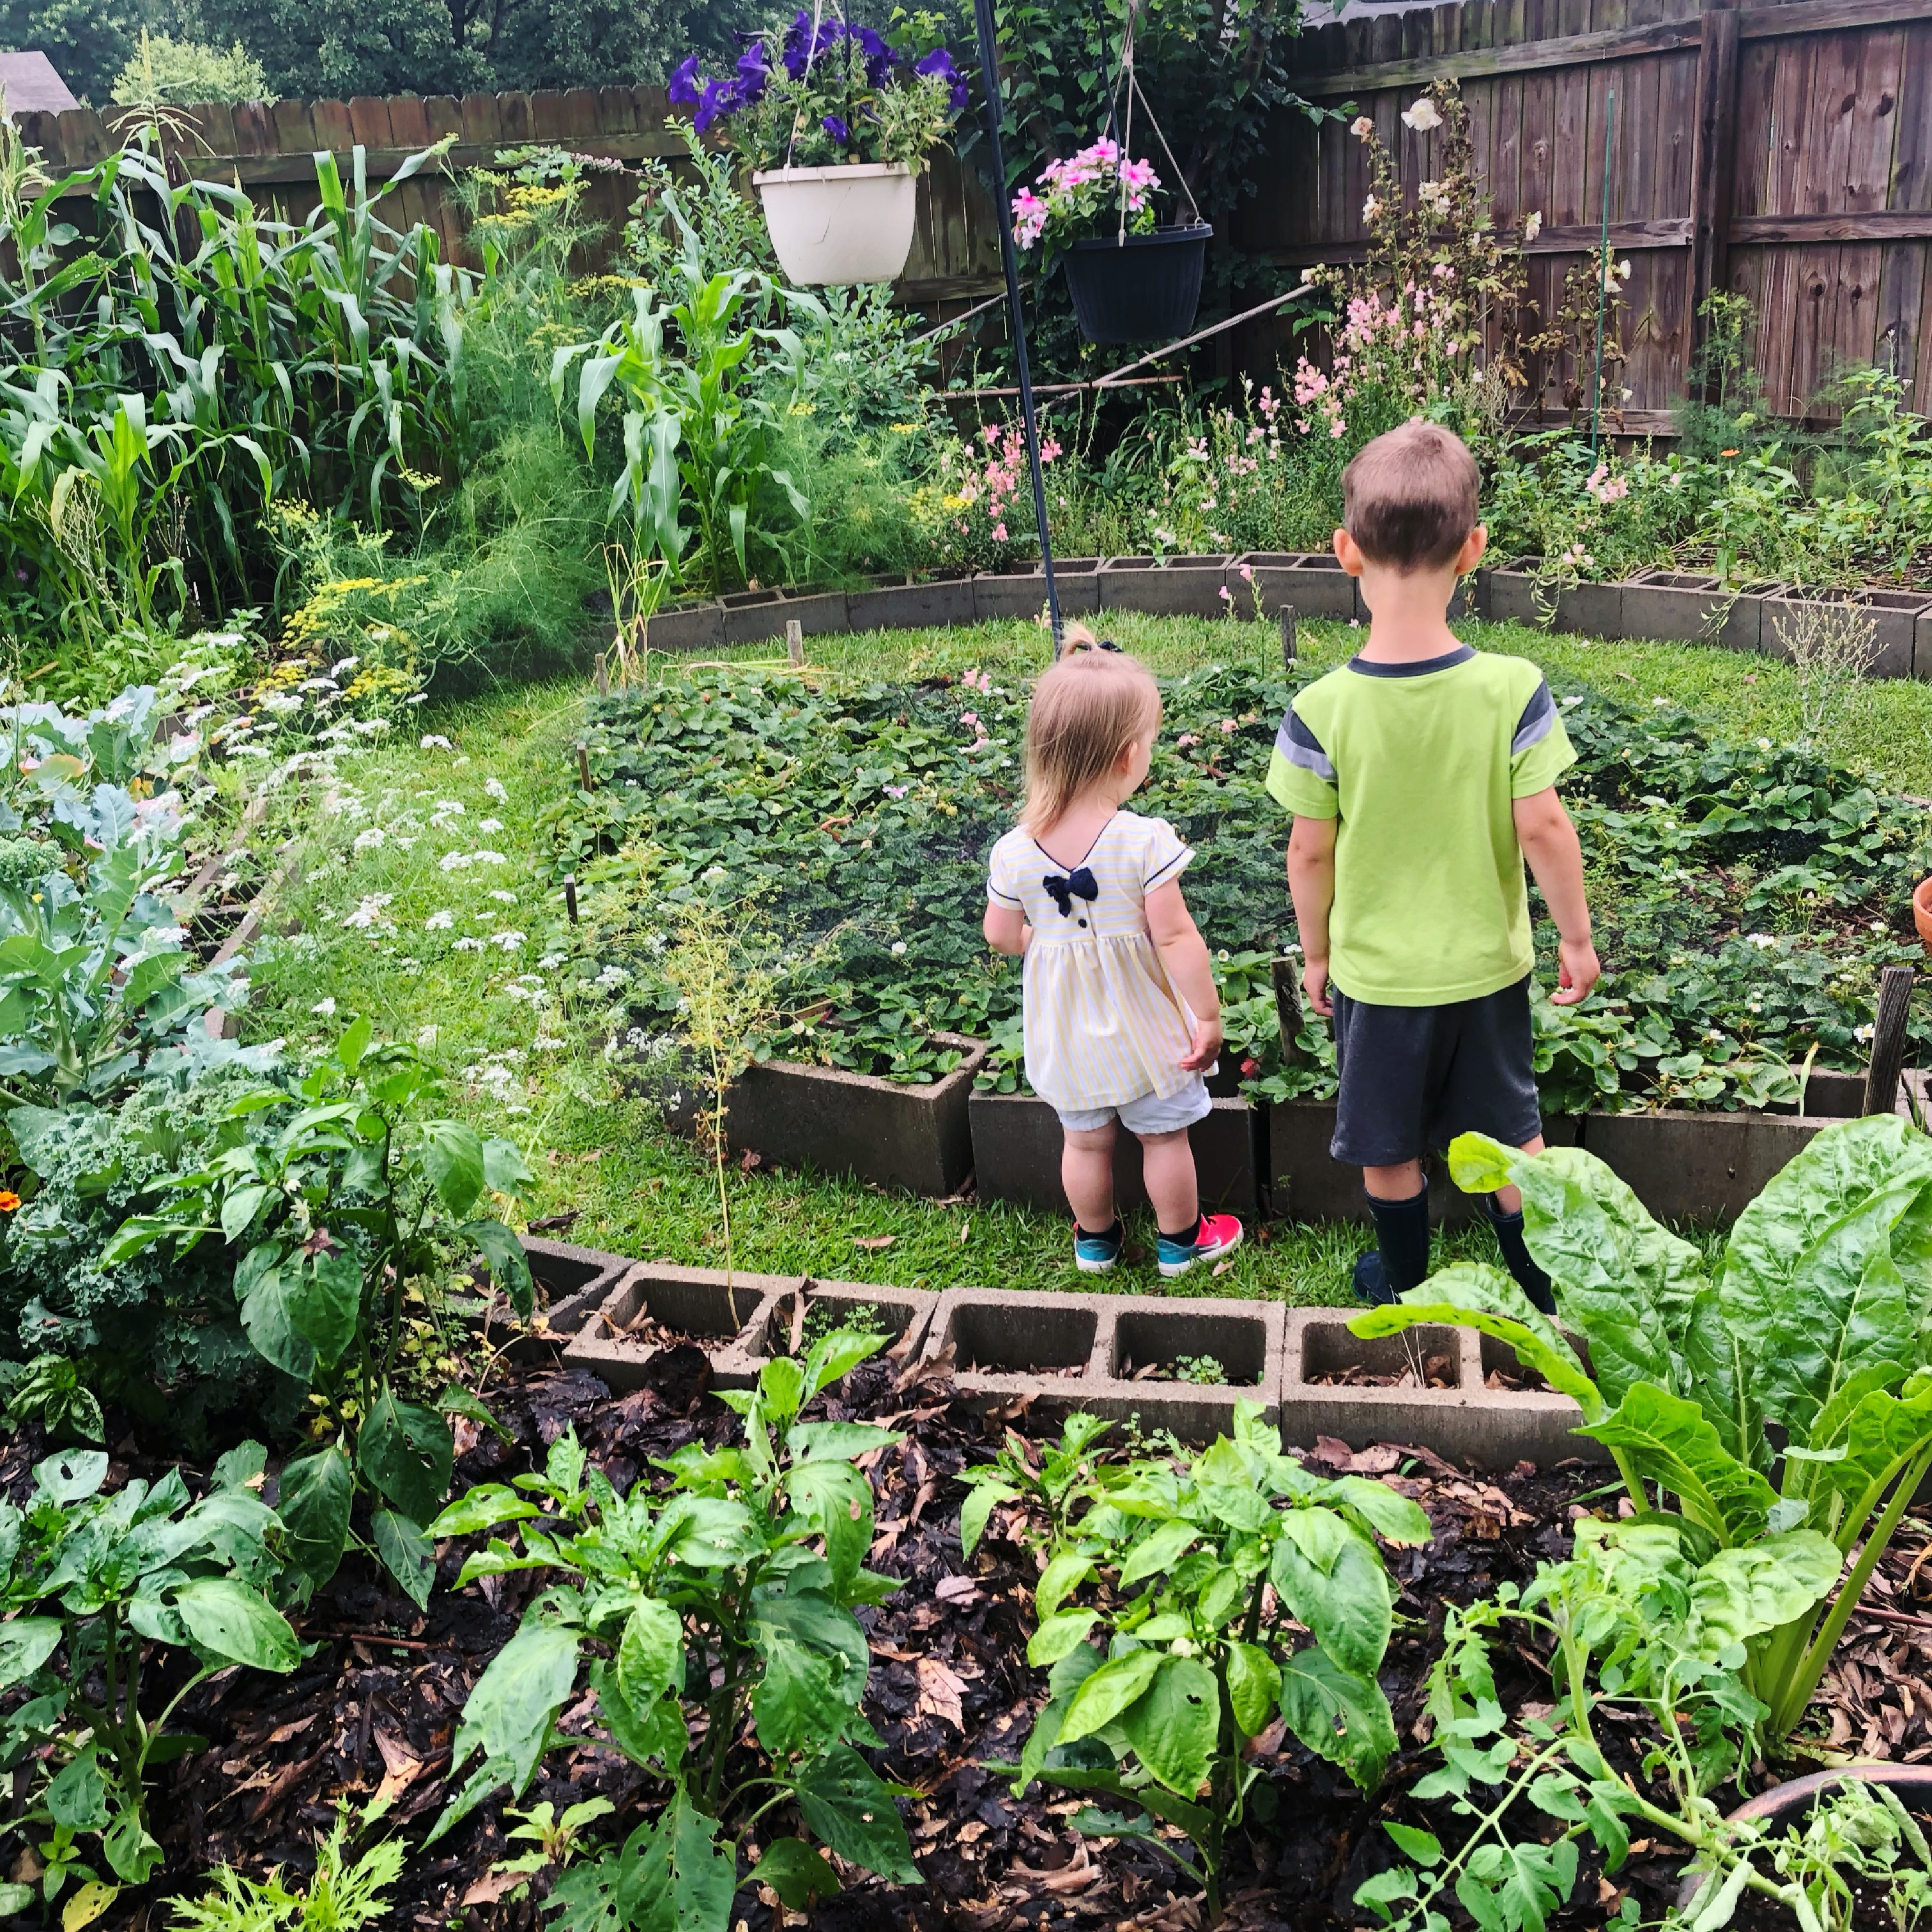
Realistically, it also meant my husband had a lot of weed-eating to do around curving beds of concrete blocks. So when he got a new job and we moved, he had one request: fewer curves, please.
The heat of the summer was already upon us when we moved to our new home in central Texas. Land in our new city was too expensive to have the garden of my dreams. So we started out on our 6,000 sq. ft. urban lot with just a couple of large pots planted with cherry tomatoes. We didn’t get any rain for most of 3 months and the temperature in our back yard was consistently well over 100 degrees Fahrenheit. The cherry tomatoes turned to tiny, wizened pinheads which my two year old happily downed.
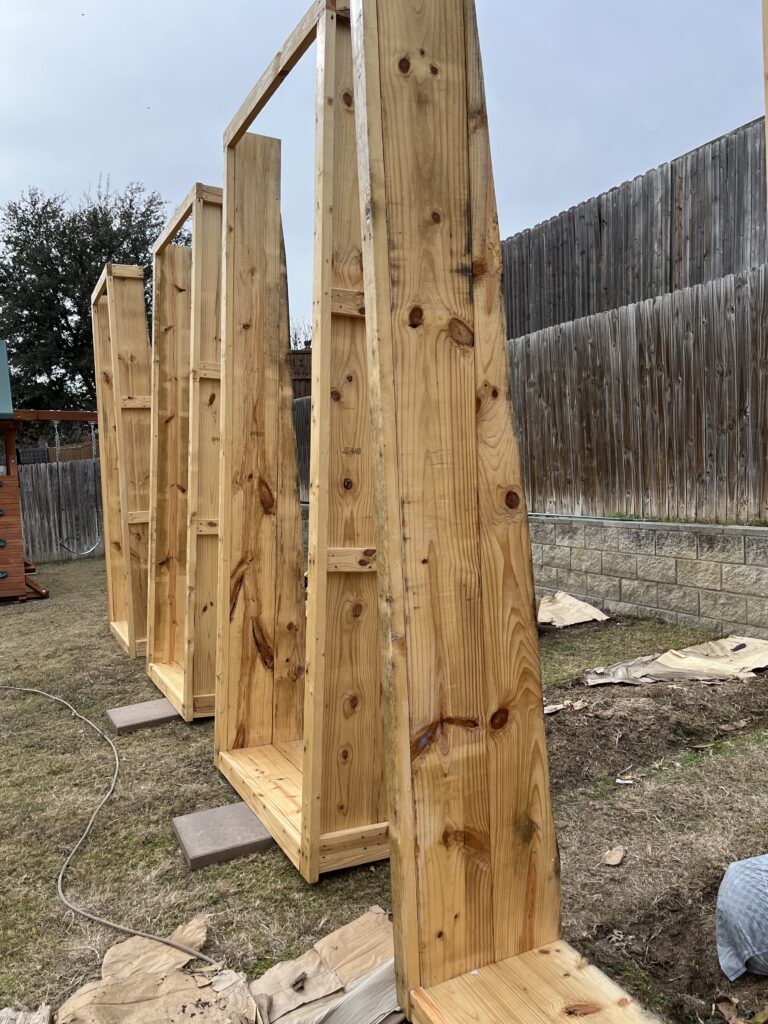
Starting the Raised Beds
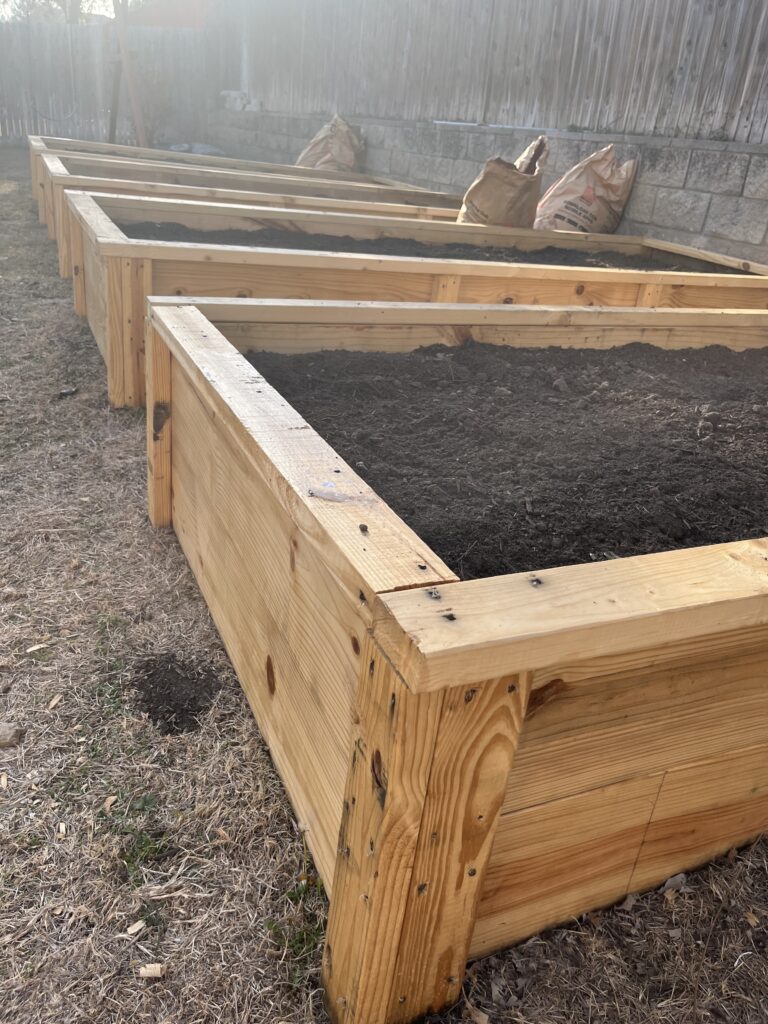
Once winter came and my husband had to come up with Christmas gifts for a gardener-wife, the raised beds started coming together. He built them to accommodate the slope of our back yard and then we painted them with a nontoxic sealant. (This is the one we used.) The next step was to fill the raised beds with a mixture of topsoil and organic compost. All this got a bit expensive, so I’m going to say that my next birthday present has also already been covered!
Before adding new soil, we tilled the soil below, I yanked out the hardiest, tough grasses, and then I layered several large sheets of cardboard and some heaps of dried grass we’d bagged while mowing over the soil. I’m hoping this provided enough of a layer to kill the grass below. I’d already been working on shading out the grass in those areas for the past months by laying sheets of cardboard over my future raised beds. Ugly, but fairly effective.

Now, the raised beds are ready to go. I’ve already planted some cool-weather crops like lettuce, Swiss chard, and kale in the soil. My husband is taking care of installing drip irrigation. Unfortunately, central Texas is too dry to depend on rainfall to water our plants here. I’m hoping drip irrigation and mulching will help us with efficient water retention.
Future Plans
I hope to expand our garden eventually, but I’m really excited about a new year of urban gardening. Growing food in the city has obvious limits (like tiny yards!) but is still rewarding!
After leaving our friends in our old home, leaving my garden was the next saddest part of our move. And this area of Texas doesn’t usually host blueberry plants well, unlike our former east Texas location. But in time, I’ll learn to grow new plants and figure out how to deal with a drier, windier climate. Wish me well and follow our journey here or on Instagram!