


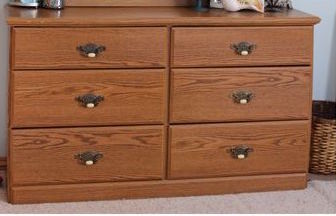
By free, I mean we got the dresser for free. It belonged to David’s grandmother once-upon-a-time, and was probably purchased some time in the 60s or 70s. Unfortunately, the paint cost some money. I didn’t make my own chalk paint; I didn’t distress multiple layers to make cool patchy things; I probably didn’t sand enough. Hey, I was nursing a 3-month-old baby at the time, which meant I had to rush out to the garage and work on the dresser during his short naps and then run back in every time he woke up and had to eat. But here are some of the things that worked/didn’t work.

Here’s what we did:
Free Laminate Dresser Transformation, Step By Step
1. Used the dresser as-was for months, because I was pregnant and worried about paint fumes.
We found out later that the paint I ended up using had hardly any fumes, but I didn’t want to take any chances.
2. Chose our paint type and color.
I waffled on paint for a while, but I ended up loving what I went with: Rust-Oleum’s Aged Gray Chalked Paint. The aged gray has that lovely blue-gray tint, especially in low light (like in our bedroom). It’s so peaceful! At first I thought it was soooo expensive for such a small can, but that one can covered the dresser 3 times (3 separate coats), part of another project I was working on, and a frame for one of our mirrors (step-by-step coming soon!). I still have some paint left in that can. So it’s actually a very thrifty purchase, in my opinion.
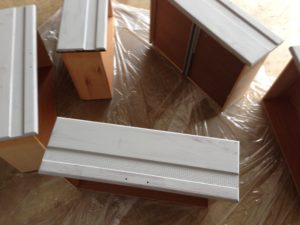
3. Removed the skinny mirror that stuck up on top.
We thought about trying to sell just the mirror on Craigslist, but our Craigslist is pretty slow-moving. So, after the mirror took up desperately needed storage space for several months, we ended up just throwing it away.
4. Sanded the whole piece lightly.
Yes, lightly, because I had a baby who needed me five minutes ago. I did spend some time on the top, using a rough piece of sandpaper with large grit to make sure the paint would have something to cling to. I mean, this was a shiny laminate piece. I was worried about paint just peeling right off. However, when I got to the drawers I ended up rushing through the job.
5. Skipped the primer.
To prime or not to prime; that is the question. Looking back, I probably should have grabbed a quart of Kilz and just given the dresser one coat. Primer is pretty inexpensive, and I was happy with my results on another project when I went ahead and used it. But I was really trying to keep costs down on this project, and I knew that it was possible that the wood-color would begin to show through with time. It did, but I’m okay with that. I like the vintage character, minus any work on my part on distressing/sanding after painting.

First coat of paint on the basketweave + laminate drawers

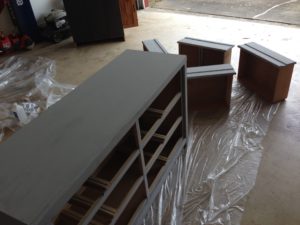

First coat of paint on the actual dresser
6. Applied my first coat of chalked paint!
Check out that stripe of basket weave on those drawers! I wish I’d taken a picture of them when they were all-the-way brown!
It was so much fun watching the paint go on. I was really surprised by a few things about the Chalked Paint:
–it has very low fumes, so I hardly smelled it as I was working with it.
–it’s chalky. I know, this should be a given, but I had only used latex and oil paints before this project. I was surprised by the thickness of the paint.
–it dries VERY quickly. Don’t wait to grab out the loose hairs from your paintbrush!
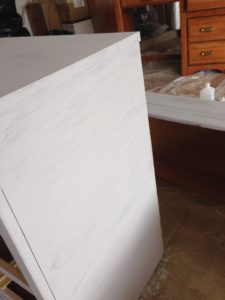
7. Added 2 more coats of paint.
I love the old-timey whitewashed look, but, as you can see in these pictures, this primer-less dresser still looked like a mess after just one coat. 2 more coats were definitely necessary. And, yes, the little can of Rust-Oleum did it all with lots left over.
8. Topped the dresser with a little sealant.
I didn’t want the shiny look–why do you think I’d just painted over the dresser? 🙂 However, we often light candles on top of the dresser or set things up there, and I wanted a little extra protection just on the top. So David helped me add a couple of light coats of Minwax Polycrylic Protective Finish. (By the way, how convenient is it that you can order all this stuff on Amazon, and, if you have Prime, it’ll arrive at your home in 2 days?!)
Here’s the thing about Minwax Polycrylic: you have to be super careful when you stir it to not make lots of air bubbles (and keep junk out of it). David didn’t read that ahead of time and went ahead and gave the whole can a good shake before opening it. Oops! One way we got rid of the bubbles on the surface was to lightly trail a brush over the top and pop the bubbles with the brush hairs. That didn’t take very long, and we don’t have bubbles on our surface anymore.
9. Painted the shiny brass drawer pulls.
I didn’t do this part. I happen to be married to a guy who used to paint airplanes as part of his day job, and he knows how to paint metal REALLY well. He used a can of this stuff, sold on Amazon as well. (Don’t get the kind with the trigger pull, we have heard, because you may have problems with it spraying well.)

Please excuse my lack of decorating skills here. I wanted to use all my romantic wedding pictures on this one dresser!
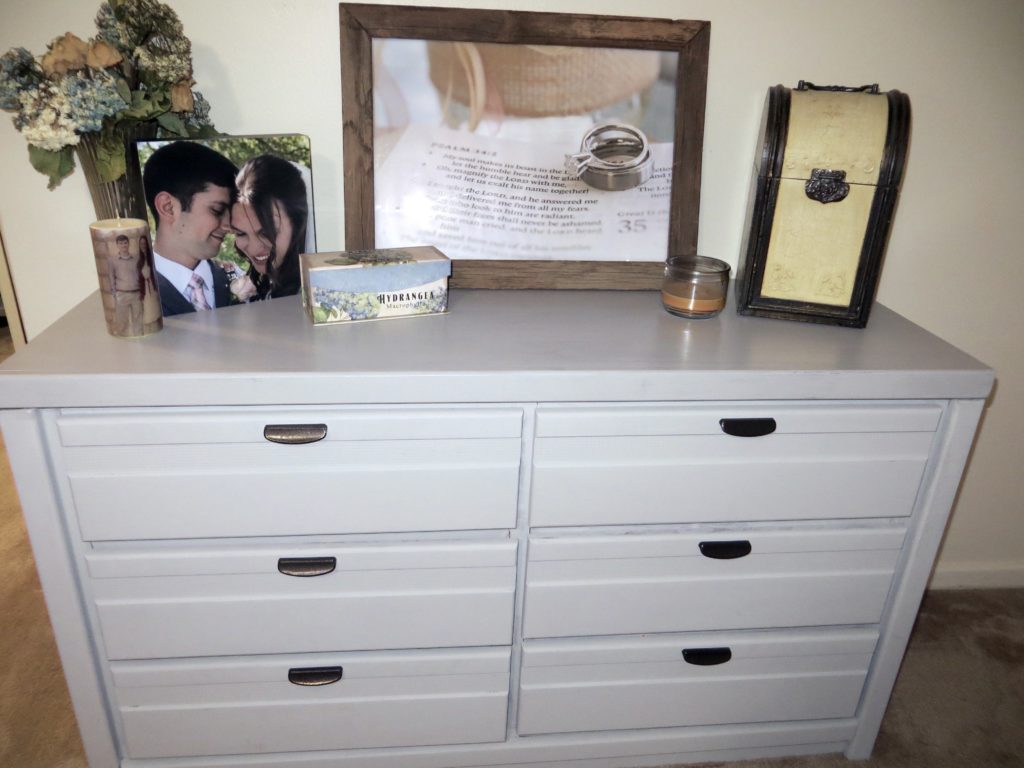
The Result
This after picture on the left I just took, five months after finishing the project. I’ve been really happy with the sealant on top (although some candle wax has caused a little discoloration in one spot). I actually love the way the wood shows through in some places (because I skipped primer), but I’m so glad I went ahead and painted three coats. A mistake I made, which you can see if you look closely, is that I didn’t paint 3 coats on the top lips of all the drawers. Many of them are suffering along with just one coat. If it bothers me at some point more than it does now (in other words, enough to take out all my clothes again), I’ll just slap a little more paint on those drawer lips. Is drawer-lip even a real thing? Y’all know what I’m trying to say…
Good luck on your painting projects! Take heart, my fellow thrifty-but-uncrafty visionaries! We may not make our furniture look professionally altered every time, but we can certainly make it look better! And we don’t have to spend $100 on an upgraded used dresser! (We spent just over $30 on this project, and we had lots of paint left over for the next project!)
The 7-Ingredient-List for Your Dresser-Painting Project:
-free, old, laminate dresser 🙂
-about 100-grit sandpaper (something pretty rough)
–2 paintbrushes–one for the paint and one for the sealant (Here’s a link to the one I’d like to have; we just used an old brush we already had on hand and bought a new one for the sealant.)
-1 quart Rust-Oleum Aged Gray chalked paint
-1 quart Min-Wax polycrylic sealant
–Rust-Oleum spray paint (for refreshing the hardware)
Also, you’ll need a paint key and something to stir the paint before using it. We had those on hand. If you don’t, you can get them super cheap at a hardware store. Or, get this fancy painter’s tool if you feel the need to have a real tool for the job.
You can get all the materials you need in 2 days with free shipping when you sign up for the Amazon Prime 30-Day Free Trial

I’d love to hear your tips for redoing furniture when you don’t have much time or money!